

WENDLab Gauge Installation Instructions
Installing your gauge is relatively simple, but depending on your ECU and your skill level, it might be a job best left to a professional. If you attempt to do this yourself, you're accepting responsibility for installing it correctly with your application.
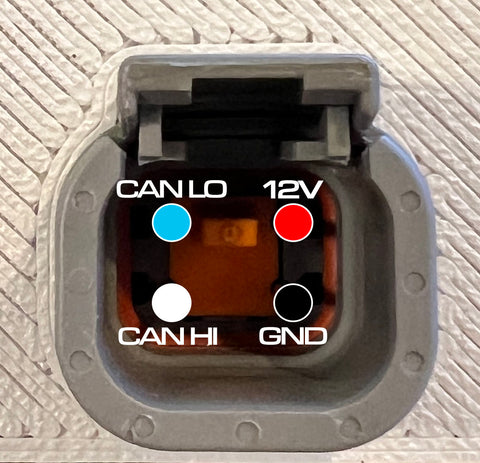
Anyway, this is what the pins on the back of the device do. The socket is a Deutsch DTM04-4P that accepts a DTM06-4S plug.
Haltech
If you ordered a device for a Haltech ECU, just plug in, no additional configuration is required.
Link
Under CAN Setup, configure the ECU to "Transmit Generic Dash 2" on Channel 1 starting at CANID 1000. Set the "Transmit Rate" value to 10hz - 20hz depending on how frequently you'd like the gauges to update. 10hz is a good place to start.

( OPTIONAL -- if you have an ethanol content sensor or want to display boost and lambda target information) On Channel 2, configure the ECU to "Transmit User Stream 1" starting at CANID 1004

Then, under "Streams" configure Stream 1 to transmit the following Parameters:
